Photographing the northern lights in Iceland is not difficult because the camera settings are mysterious. It is difficult because the conditions are moving: the aurora changes shape, clouds move in, wind shakes the tripod, batteries die in the cold, and headlights from other travelers can ruin a perfect exposure.
This guide is written for real travelers. If you have a mirrorless camera or DSLR, you will find practical manual settings. If you only have a phone, there is a full phone section too, because modern phones can capture the aurora surprisingly well when they are kept still and used properly.
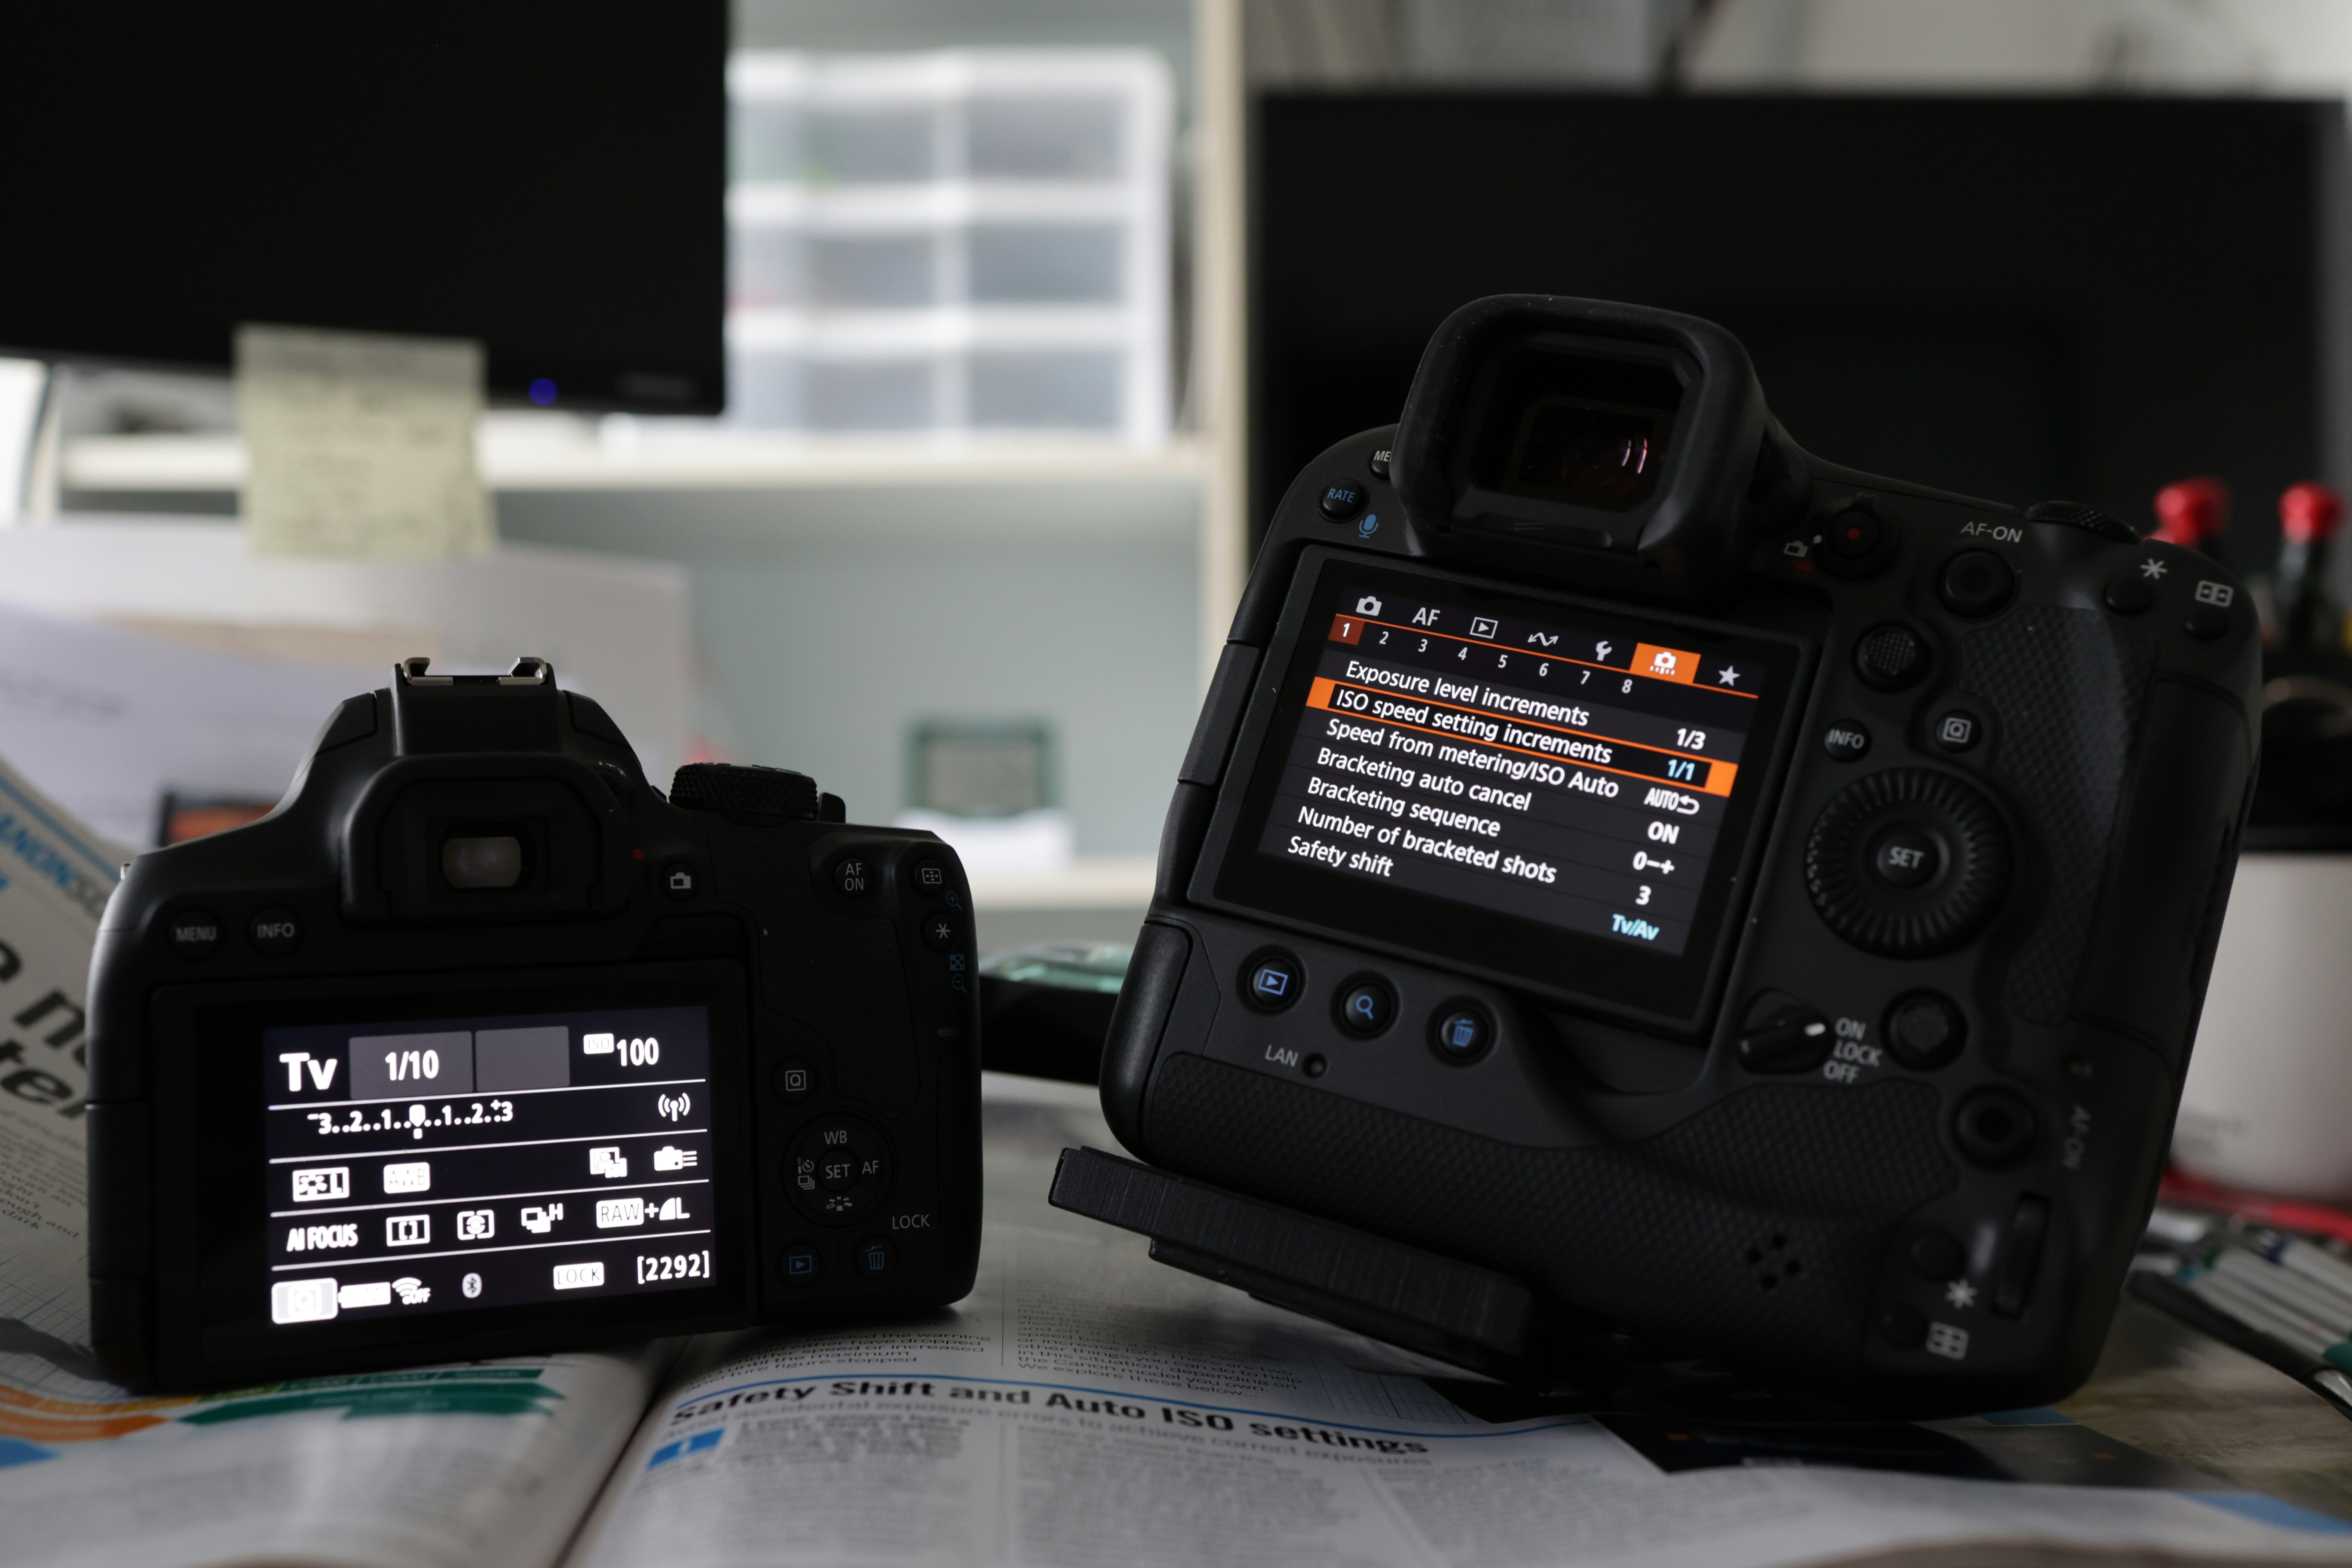
Use manual mode, shoot RAW, set focus manually to infinity, use a tripod, start around ISO 1600-3200, aperture f/2.8 or wider, and a shutter speed between 5 and 15 seconds. If the aurora is moving fast, shorten the shutter. If it is faint, raise ISO or lengthen exposure carefully.
Before You Think About Settings
The biggest mistake is treating aurora photography like a settings problem. Settings matter, but location and sky conditions matter more. You need darkness, clear skies, a stable camera, and enough patience to wait for the lights to strengthen. A perfect camera will not photograph aurora through thick cloud.
Start with the same basics as aurora watching: travel between September and March, get away from city lights, check cloud cover, check the aurora forecast, and avoid unsafe winter driving. The general Northern Lights in Iceland guide explains forecasting and locations in more detail; this page focuses on photography.
If you are tired, the roads are icy, or the cloud forecast looks hopeless, do not force a long night drive for a photo. Stay near your accommodation, wait for another night, or book a tour with a driver.
Best Camera Settings for Northern Lights
Start with a simple baseline and adjust from there. The aurora is not one brightness. It may be a faint grey-green glow on the horizon, or it may explode overhead and move so fast that a long exposure turns it into a blurry green blanket.
| Situation | Starting settings | What to adjust |
|---|---|---|
| Faint aurora | ISO 3200, f/2.8, 10-20 sec | Use a longer exposure carefully. If stars trail or the aurora smears, shorten the shutter and raise ISO. |
| Normal visible aurora | ISO 1600-3200, f/2.8, 5-10 sec | This is the safest starting range for most Iceland nights. |
| Strong moving aurora | ISO 800-1600, f/2.8, 2-6 sec | Shorten the shutter to preserve shape and detail in the curtains. |
| Bright moon or snow | ISO 800-1600, f/2.8, 4-8 sec | Lower ISO if the foreground becomes too bright. |
Focus manually
Autofocus is unreliable in the dark. Before you start shooting, switch to manual focus and focus on a bright star, a distant light, or the moon if it is visible. Zoom in on the screen, adjust until the point of light is as small as possible, then leave focus alone. Do not trust the infinity mark blindly; many lenses focus slightly past infinity.
Use a short enough shutter
A common beginner mistake is using 25 or 30 seconds for every aurora photo. That can work when the lights are faint and slow, but it often turns active aurora into a soft blur. In Iceland, when the lights start dancing overhead, try 2-6 seconds. You may need higher ISO, but the shape will look much better.
How to Photograph the Northern Lights With a Phone
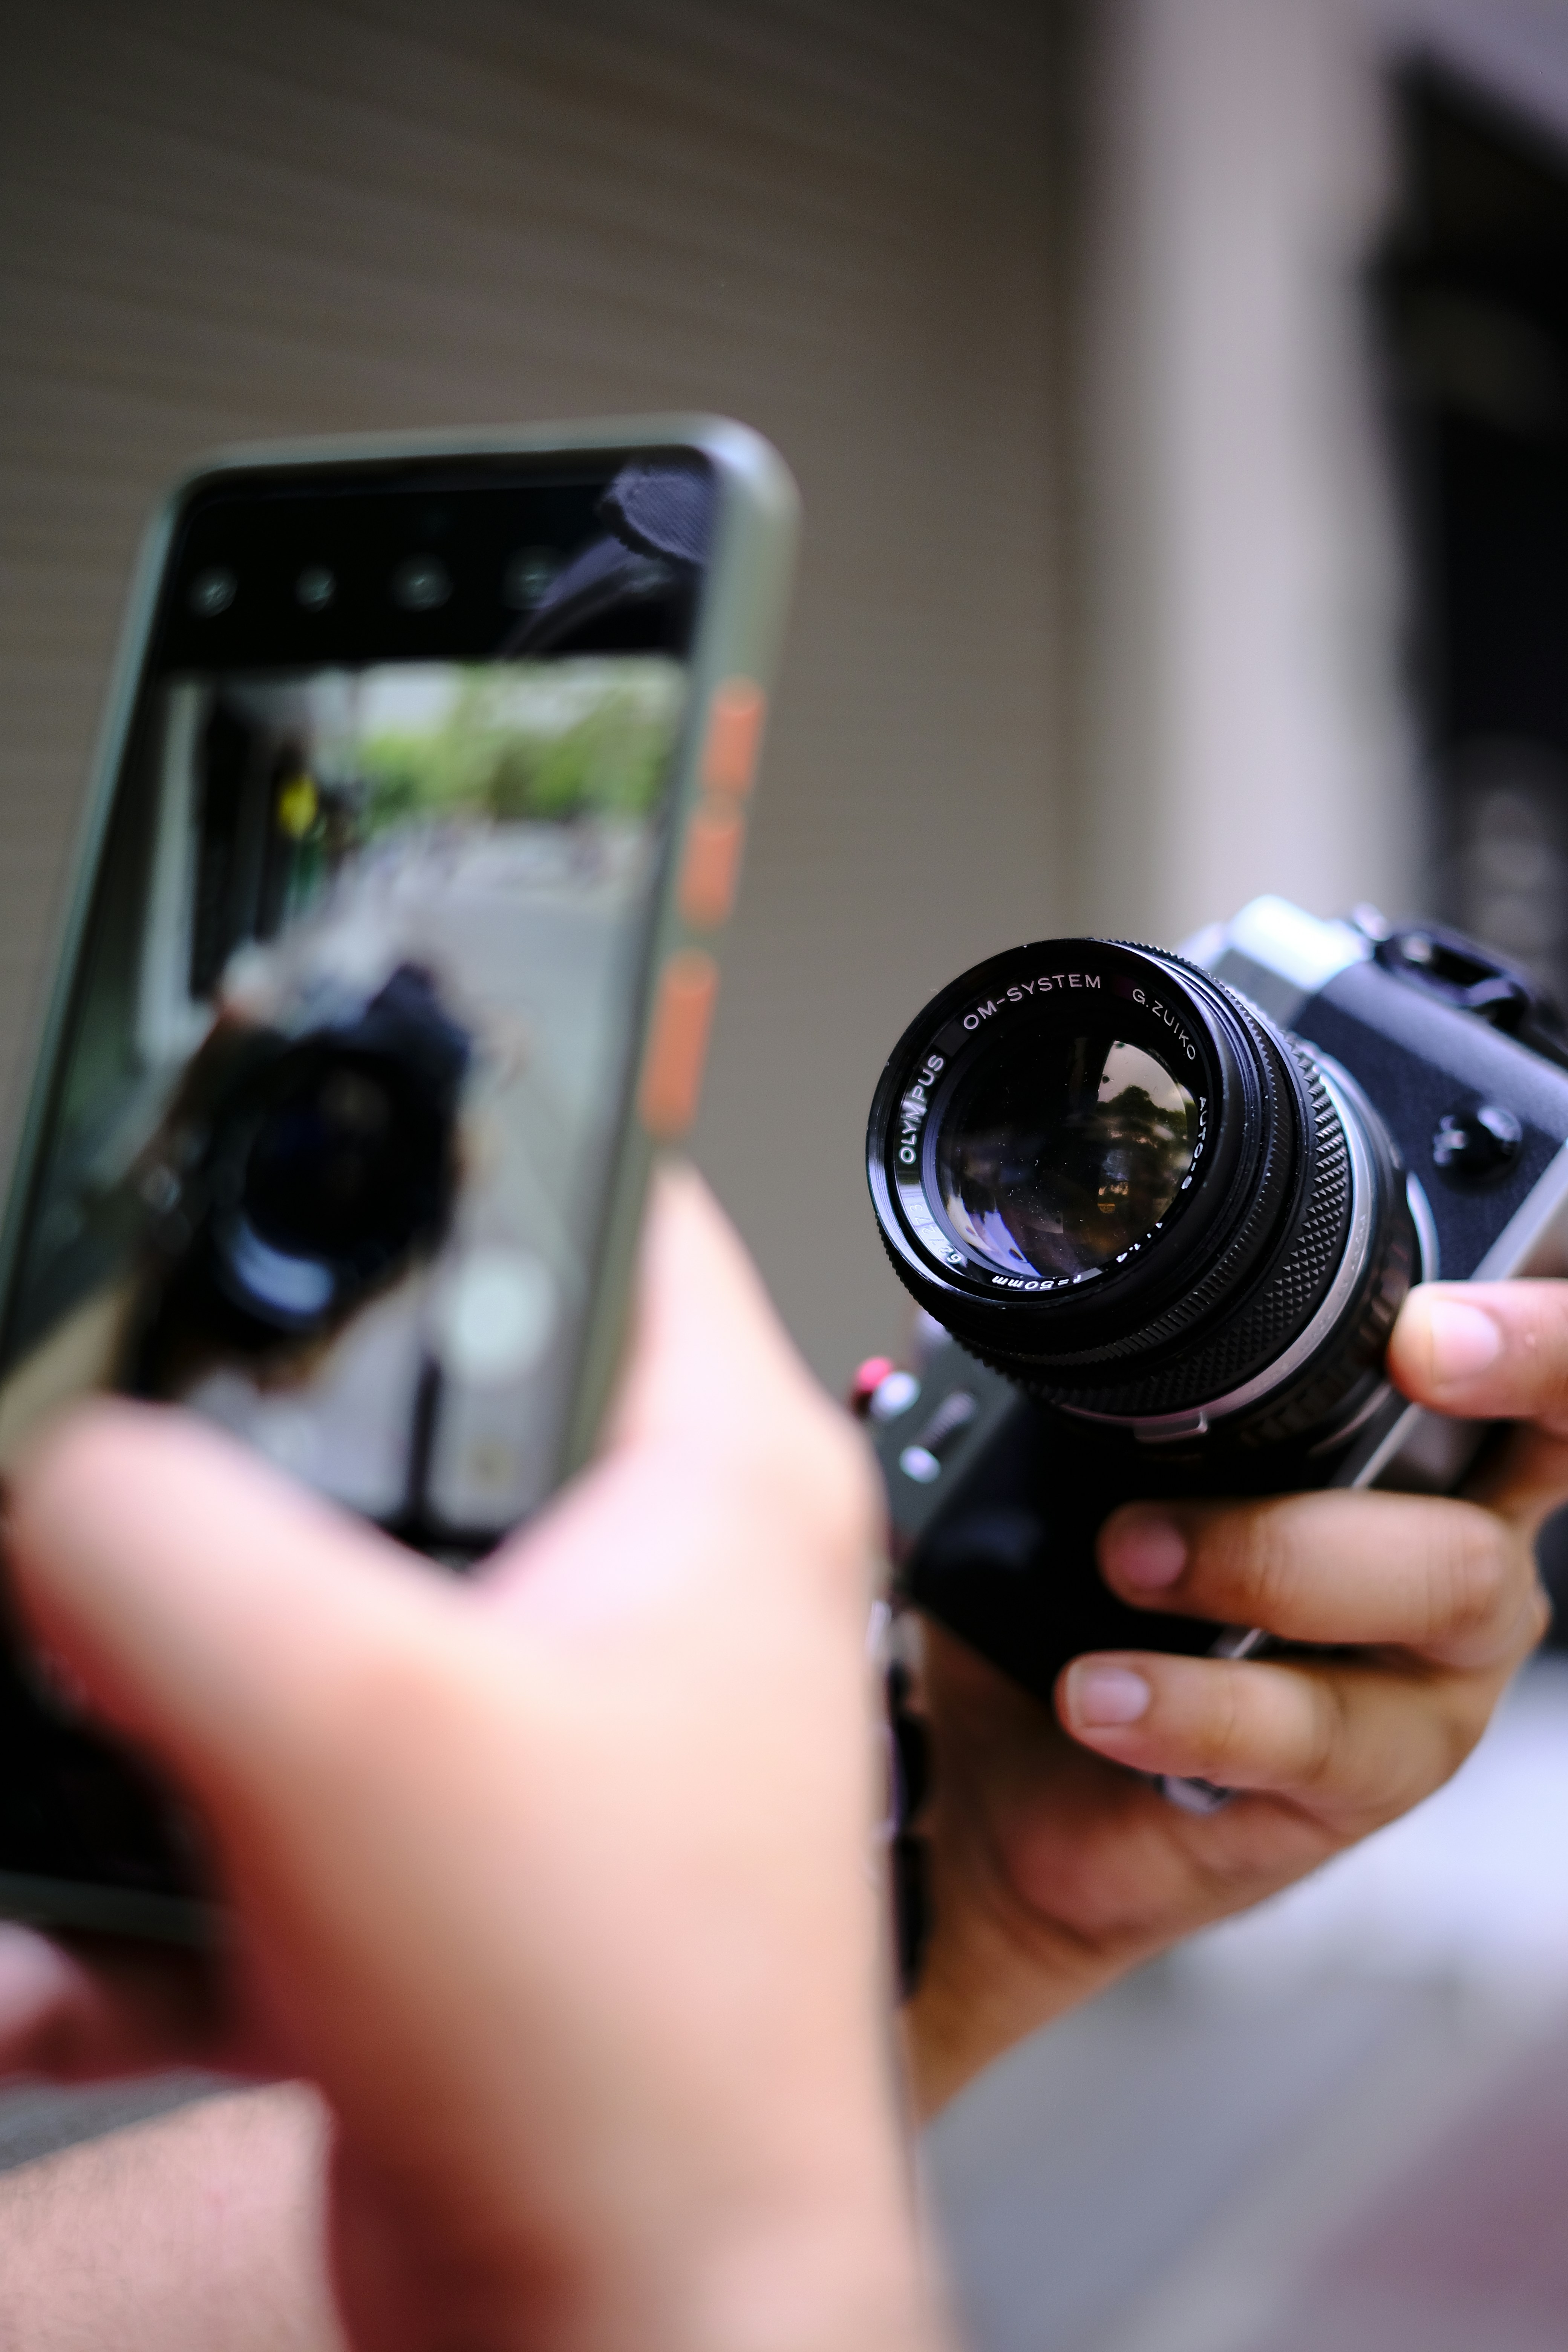
You do not need a professional camera to take a northern lights photo. Recent iPhones, Samsung Galaxy phones, Google Pixel phones, and other modern phones with night mode can capture aurora if the lights are visible and the phone is kept still. The key is stability. A handheld phone photo is usually the reason people fail.
Use Night Mode or Pro Mode, turn off flash, clean the lens, support the phone on a tripod or solid surface, use a 3-10 second exposure if available, lower exposure if the sky is too bright, and use a timer so touching the screen does not shake the phone.
Phone step-by-step
- Turn on Night Mode, Astro mode, or Pro Mode if your phone has it.
- Set the phone on a small tripod, against a rock, on a car roof, or on a backpack. Do not hand-hold it.
- Turn off flash. Flash will only light up nearby objects and annoy other people.
- Wipe the lens. A tiny smear becomes a soft halo around stars and lights.
- If you can control exposure time, start around 3-10 seconds.
- If the image looks washed out, reduce exposure or tap the sky and drag brightness down.
- Use a 2-second timer or remote shutter so the phone does not move when you press the button.
- Keep the phone warm in a pocket between shots. Cold drains batteries quickly.
Phones often make aurora look brighter and greener than it looks to your eyes. That is normal. The camera is collecting light for several seconds. Take the photo, but also put the phone down and watch the sky. The memory matters more than the screen.
Best Iceland Locations for Aurora Photos
The best aurora photo location has three things: dark sky, a safe place to stand, and an interesting foreground. Empty sky photos get boring quickly. Iceland gives you mountains, churches, lava fields, waterfalls, glacier lagoons, coastlines, and old farms. Use them.
Composition Tips
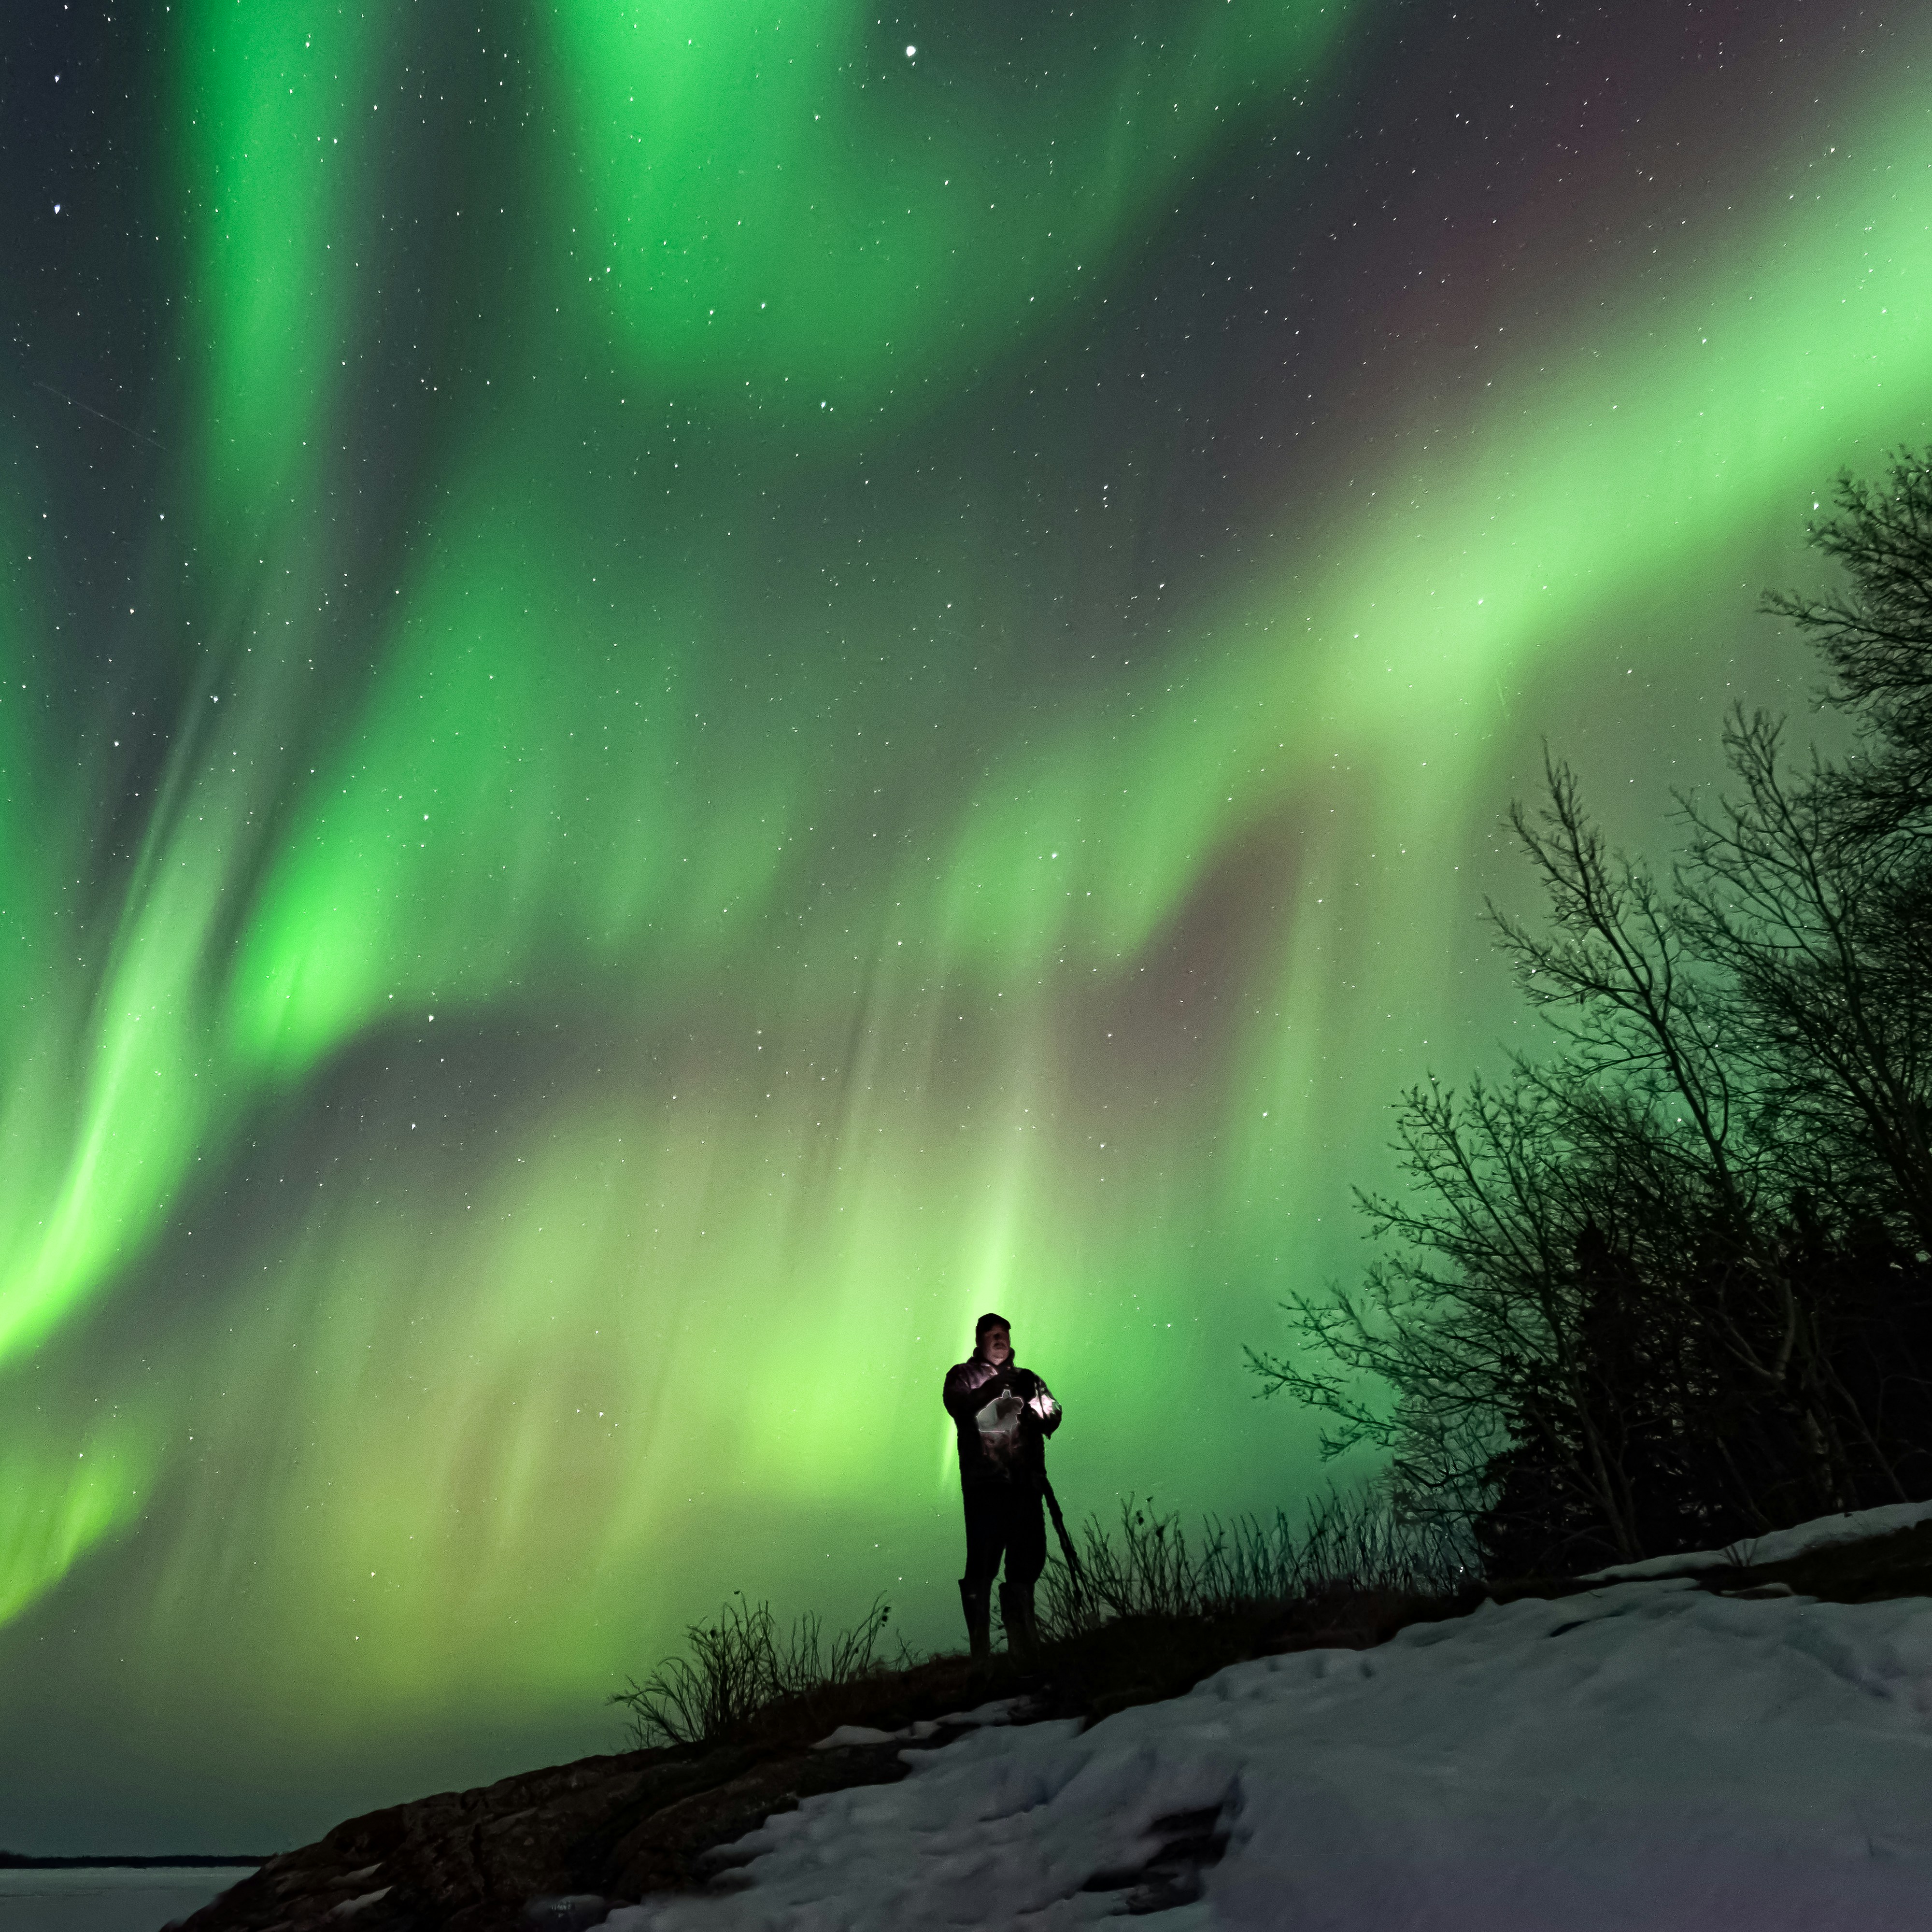
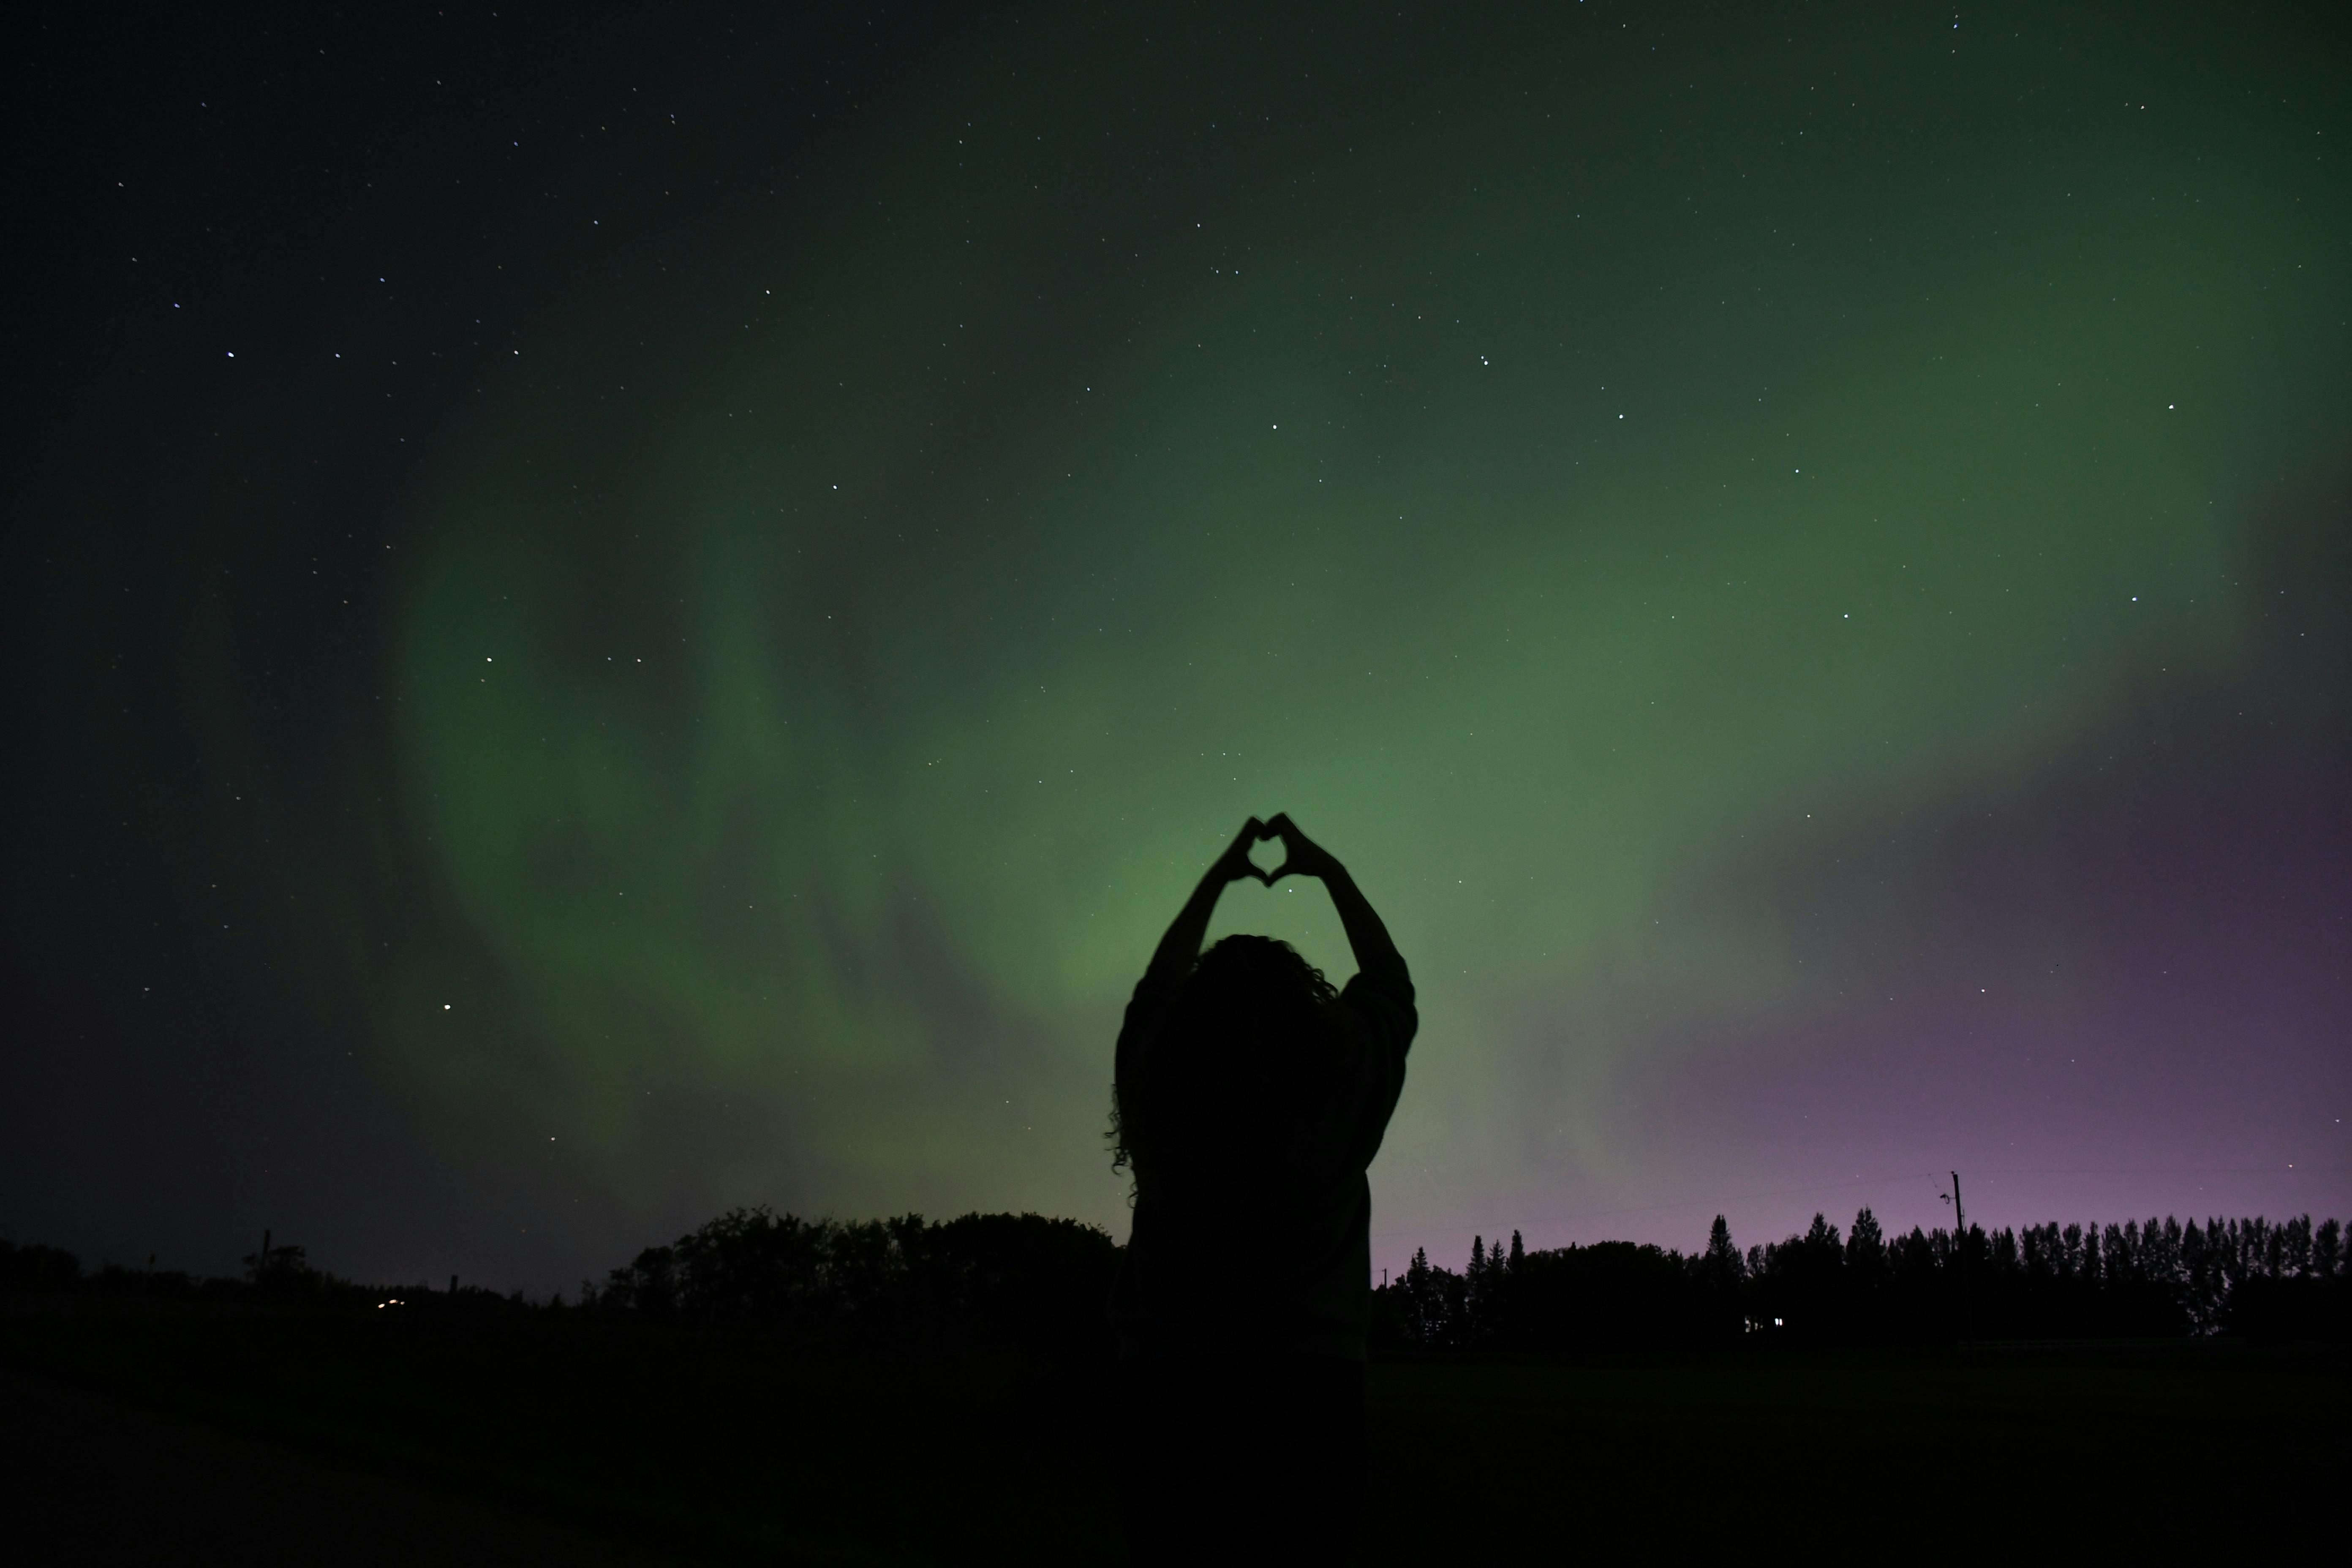
A northern lights photo is usually stronger when it shows Iceland around the aurora. Put something in the foreground: a mountain shape, a small church, a person with a headlamp, a parked car, a waterfall, a coastline, or reflected light on water. Keep the horizon level and leave enough sky for the aurora to move through the frame.
If the moon is out, do not assume the night is ruined. Moonlight can brighten the landscape and make the foreground easier to photograph. A full moon can overpower faint aurora, but a partial moon can be useful. Snow also reflects light, which can help foregrounds look clean and detailed.
Weather, Clouds, and Safety
Cloud cover is often more important than KP. A KP 6 aurora behind cloud is useless for photography, while a KP 2 display under clear dark sky can still produce a good image. Check the cloud forecast on vedur.is, then check road conditions on road.is before driving at night.
Do not stop in the road for a photo. Use proper pullouts, car parks, and safe viewpoints. In winter, icy shoulders, blowing snow, and poor visibility can turn a simple photo stop into a problem. If the weather is bad, stay closer to your accommodation or book a northern lights tour instead of driving far in the dark.
Pick two or three nearby photo spots before dinner, check cloud cover after dark, then choose the safest clear-sky option. Do not start the night by randomly driving into the countryside.
Gear Checklist
Common Mistakes
- Using autofocus: the camera hunts in the dark and produces soft images.
- Using too long a shutter: strong aurora becomes a green blur.
- Skipping the tripod: even night mode phones need stability.
- Only chasing KP: clear sky beats a high forecast behind clouds.
- Standing near headlights: car lights and headlamps can ruin exposures.
- Forgetting warm clothes: cold photographers rush, shake, and quit early.
- Driving too far at night: Icelandic winter roads deserve respect.
Simple Editing Tips
Edit gently. Increase contrast a little, pull down highlights if the aurora is blown out, lift shadows enough to reveal the foreground, and adjust white balance if the image looks too yellow or too blue. Avoid pushing saturation so far that the aurora looks fake. Iceland already does enough drama on its own.
FAQ
Can you photograph the northern lights with a phone?
Yes. Modern phones with Night Mode, Astro mode, or Pro Mode can photograph the northern lights if the aurora is visible and the phone is kept still. Use a tripod or solid support, turn off flash, clean the lens, and use a timed exposure if possible.
What ISO should I use for northern lights photos?
Start around ISO 1600-3200. Use lower ISO such as 800-1600 when the aurora is bright, the moon is strong, or snow makes the foreground very reflective. Raise ISO only when the aurora is faint and the shutter cannot be longer.
Do I need a tripod for aurora photography?
Yes, for cameras. For phones, a tripod is strongly recommended, although a rock, backpack, fence post, or car roof can work in a pinch. The camera or phone must stay still during the exposure.
What month is best for northern lights photography in Iceland?
September to March is the main season because Iceland has enough darkness. October, November, February, and March often give a good balance of darkness, road access, and aurora chances, but clear skies matter more than the calendar.
Where near Reykjavík can I take northern lights photos?
Grótta, Kleifarvatn, Þingvellir, and darker areas outside the city are better than central Reykjavík. Strong aurora can sometimes be visible from the city edges, but light pollution makes photography much harder.
The Bottom Line
The best northern lights photo is usually the result of simple settings, good preparation, and patience. Use a stable camera or phone, focus carefully, watch the clouds, and choose a safe place with an interesting foreground. If the lights appear, take your photo. Then take a minute to stop adjusting settings and simply look up.